How to show Custom Fields in Trello's Table View


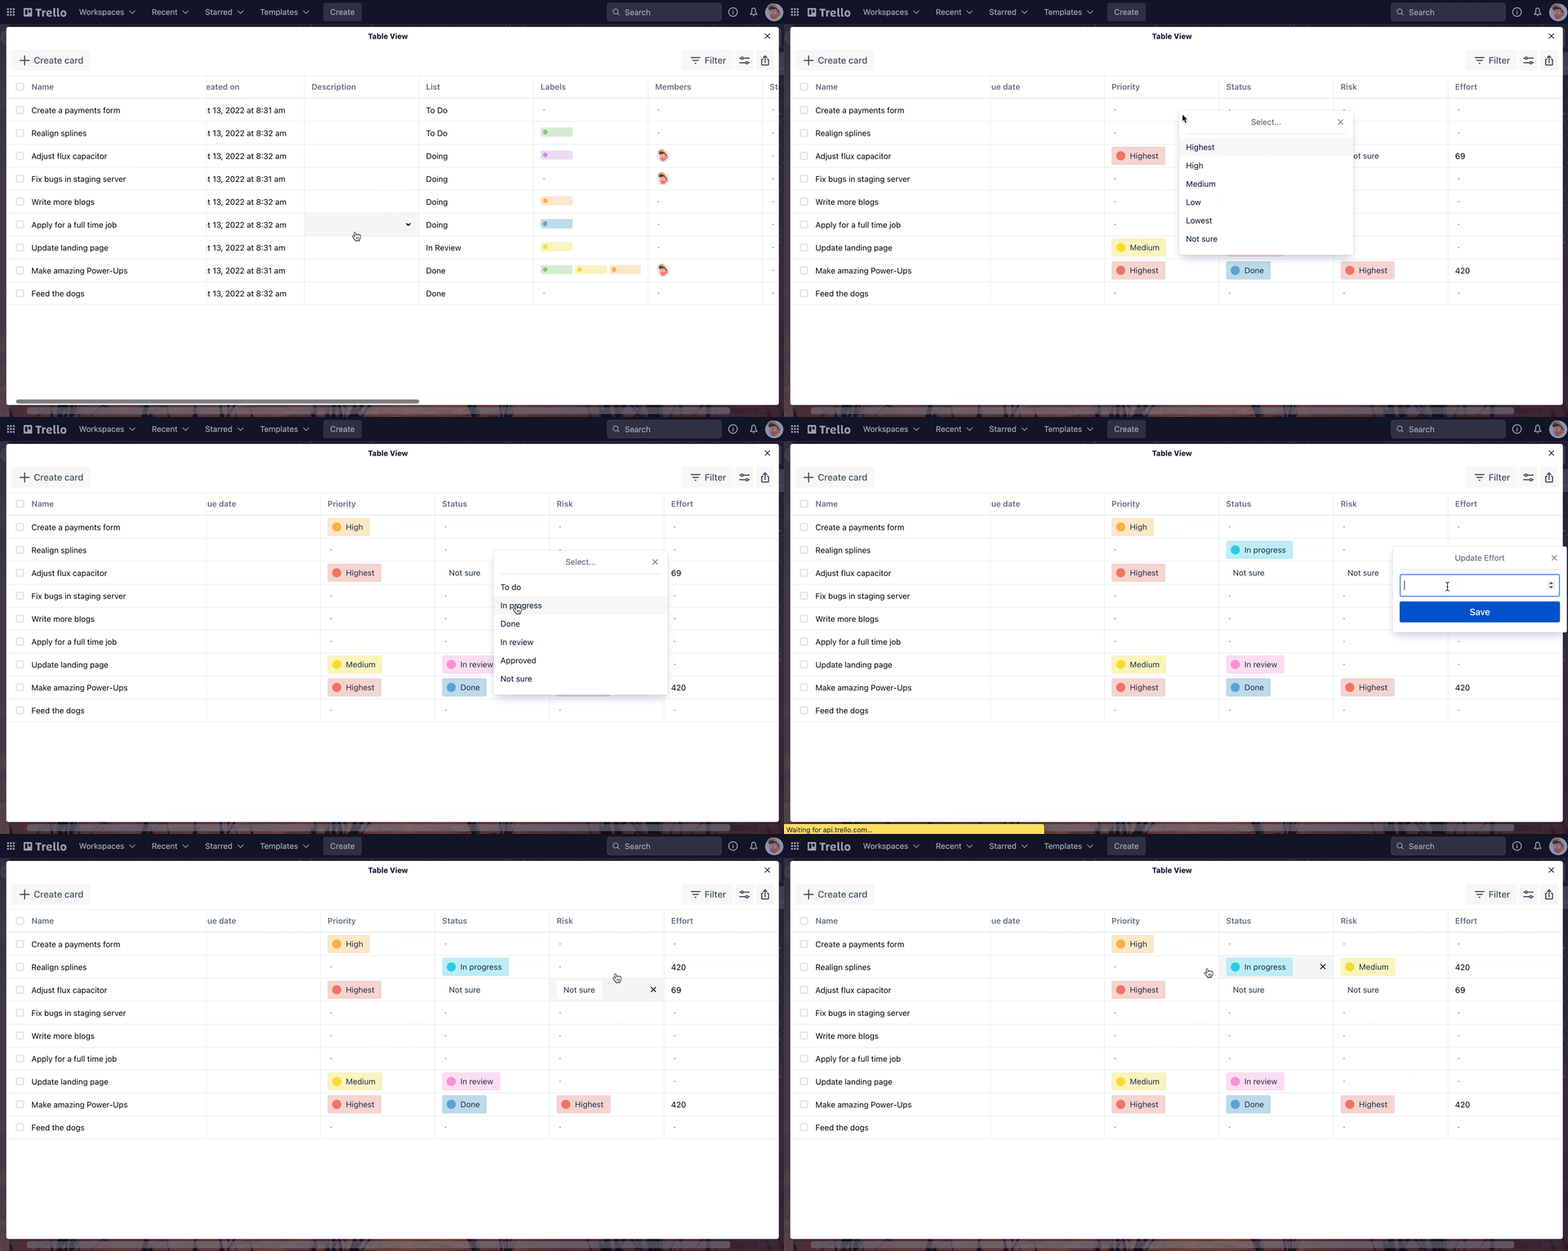
The new native Table View feature does not support Custom Fields. Luckily, the classic Table View Power-Up by Tiny Power-Ups Club still does! Here's how you can get started with it:
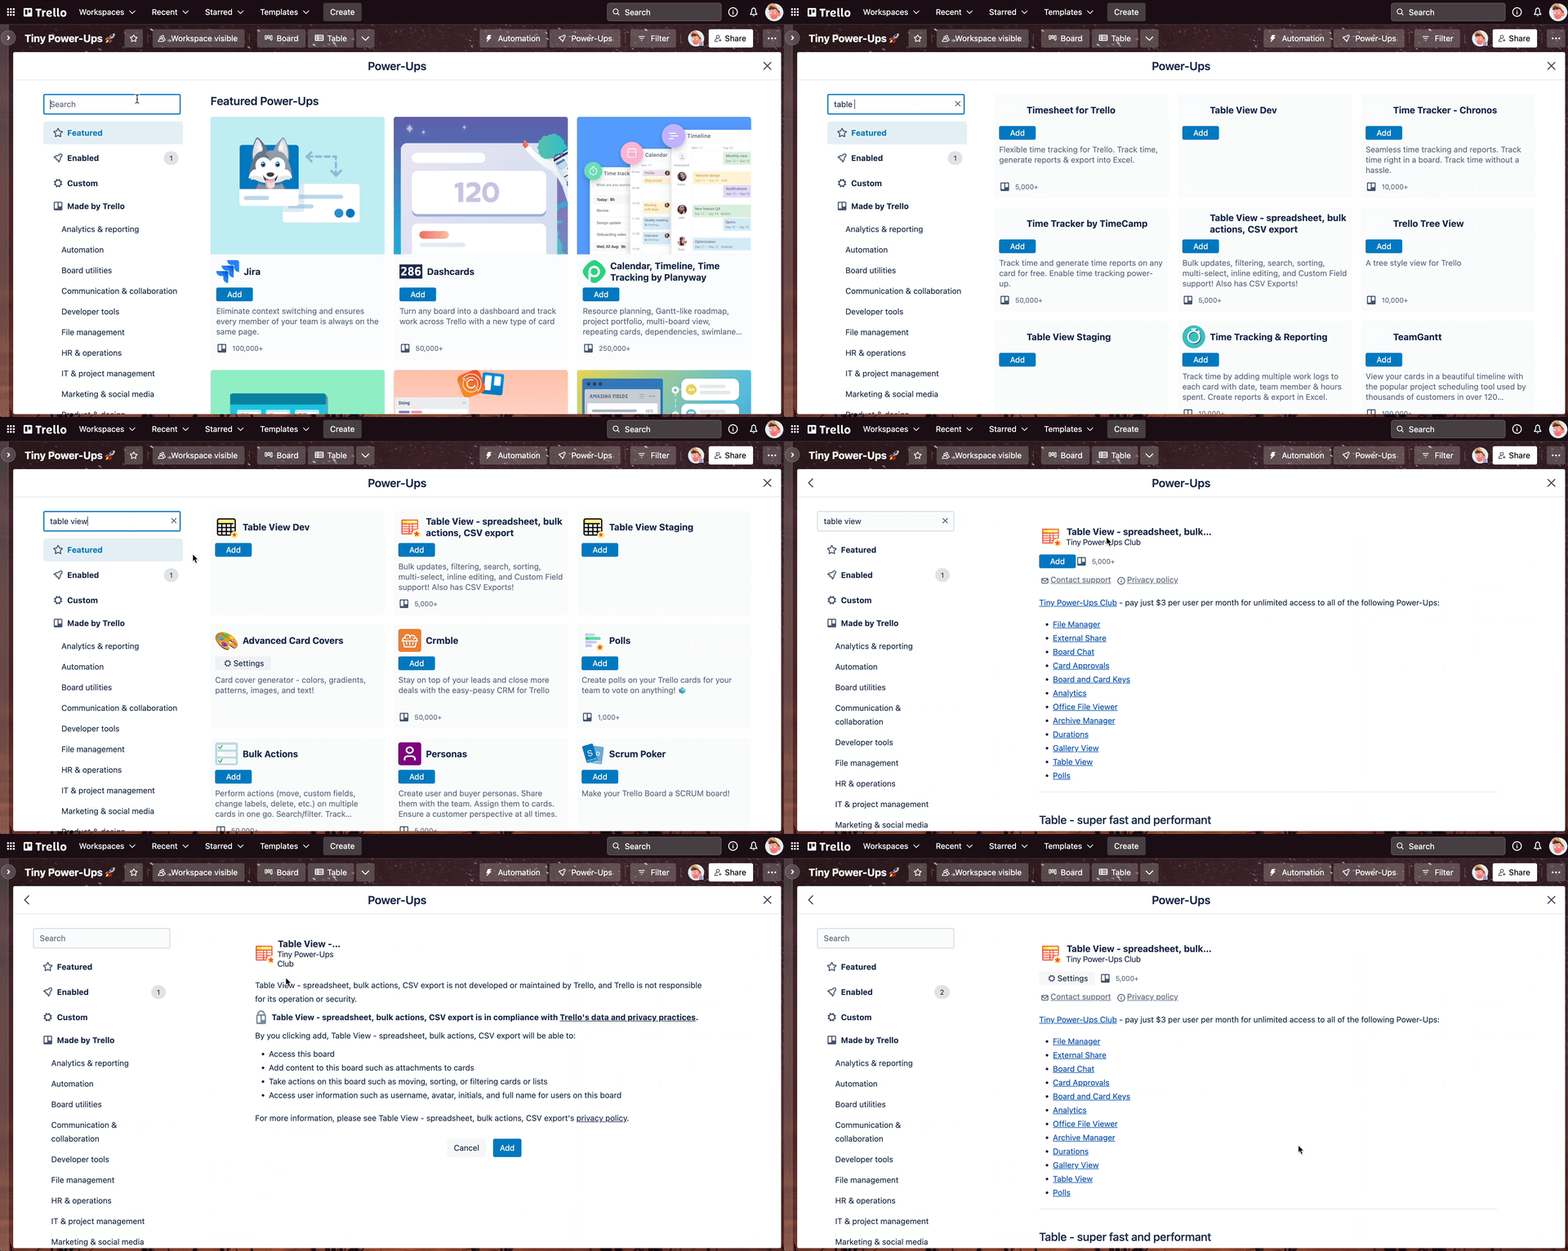
1. Enable the Power-Up on your Trello board
You can enable the Table View Power-Up at this link or search for "table view" in the Power-Up Directory.
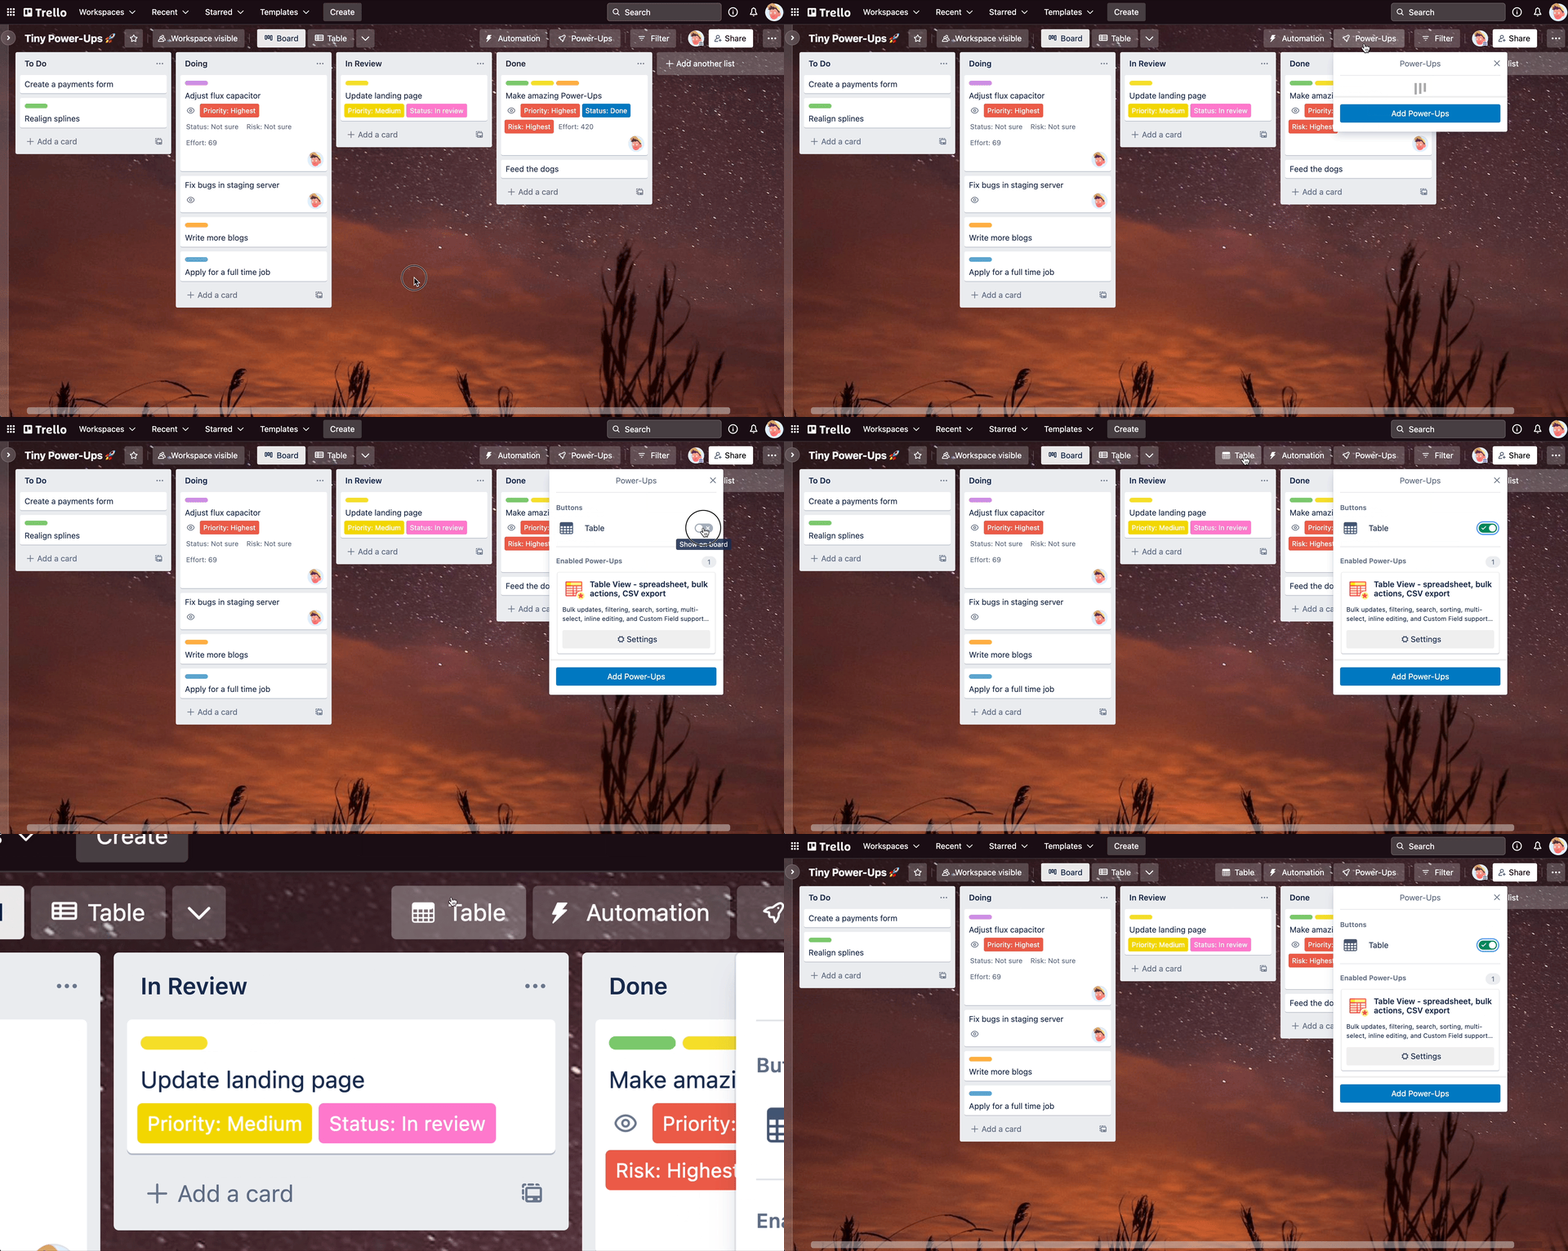
2. Make sure the "Table" board button is showing
Once the Table View Power-Up is enabled, you should see the "Table" button appear at the top right hand of your board. If it doesn't show up you can toggle it on via the Power-Ups menu.
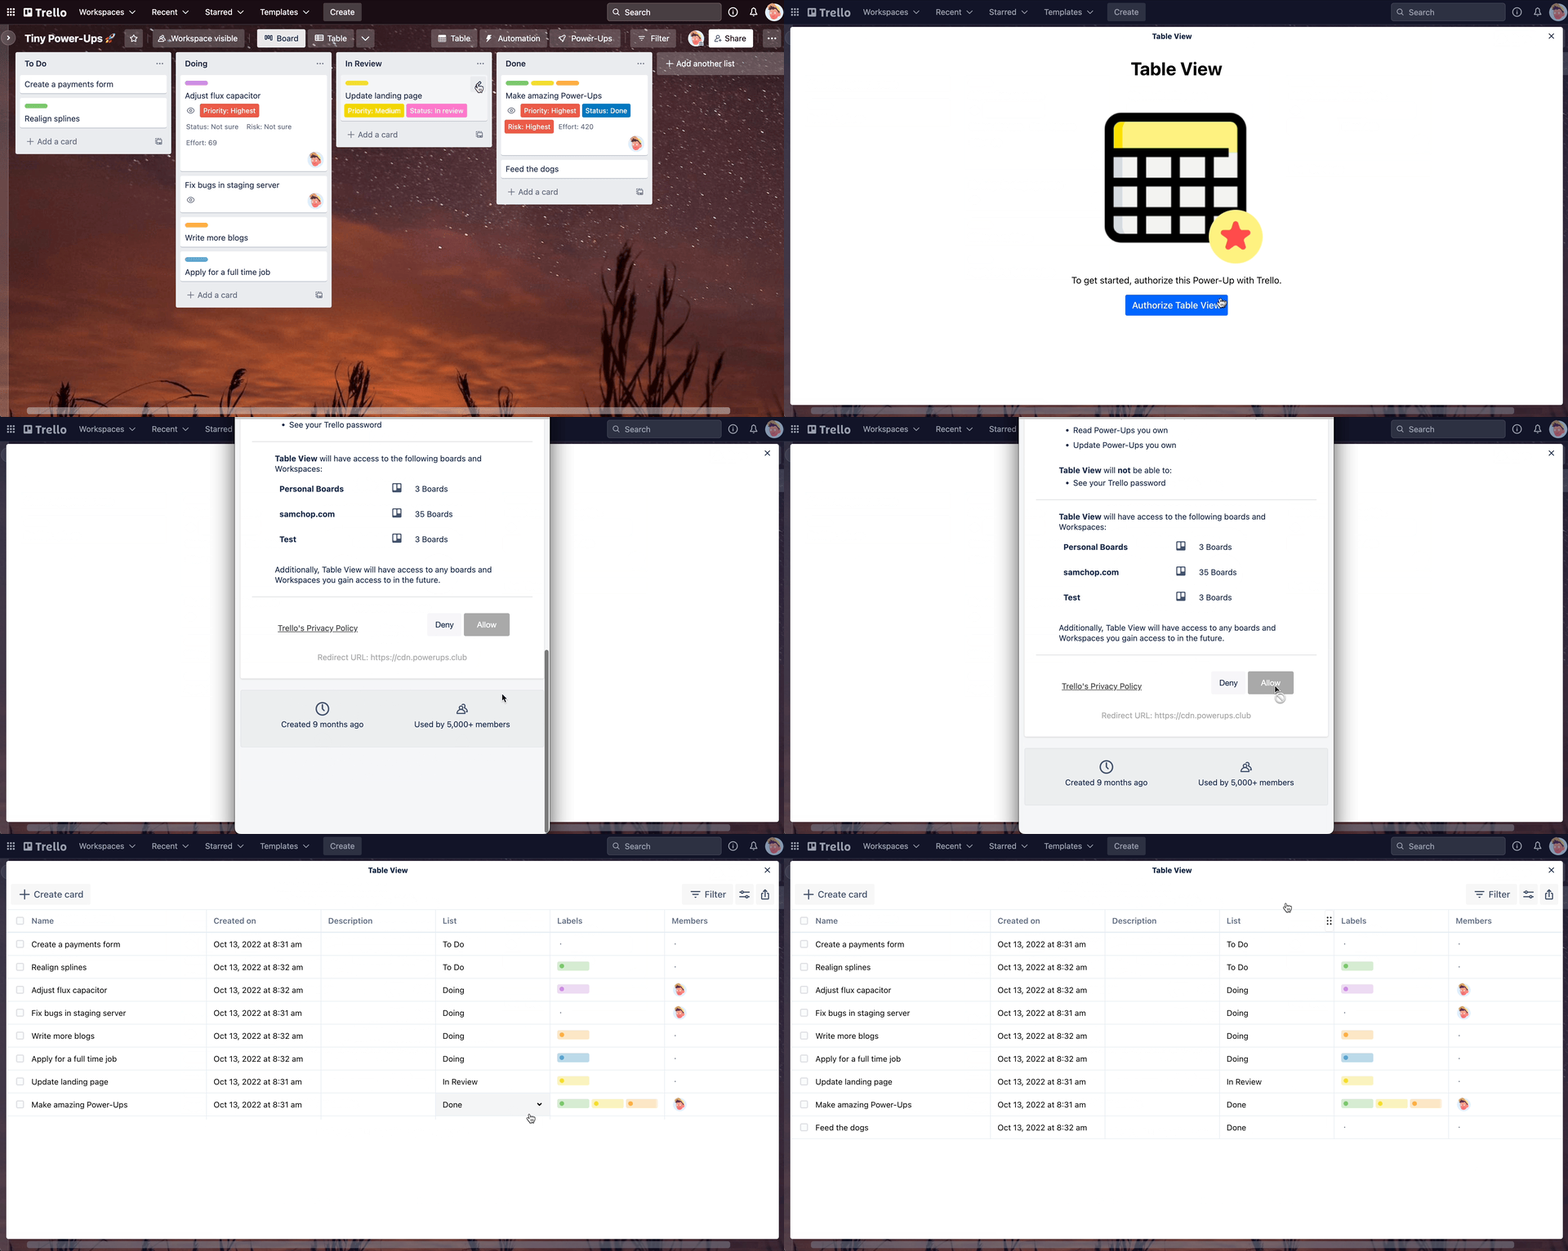
3. Authorize the Power-Up
Clicking the "Table" button will open the Table View Power-Up. The first time you open it, you will be prompted to Authorize the Power-Up. This is needed so the Power-Up can safely and securely access the Trello API on your behalf.
4. Start using Custom Fields in a Table View
Now that you've authorized the Table View Power-Up, you can use the Table View with your board's Custom Fields. You can update the values directly within the view.
You can also hide/show certain Custom Field columns and even reorder them.
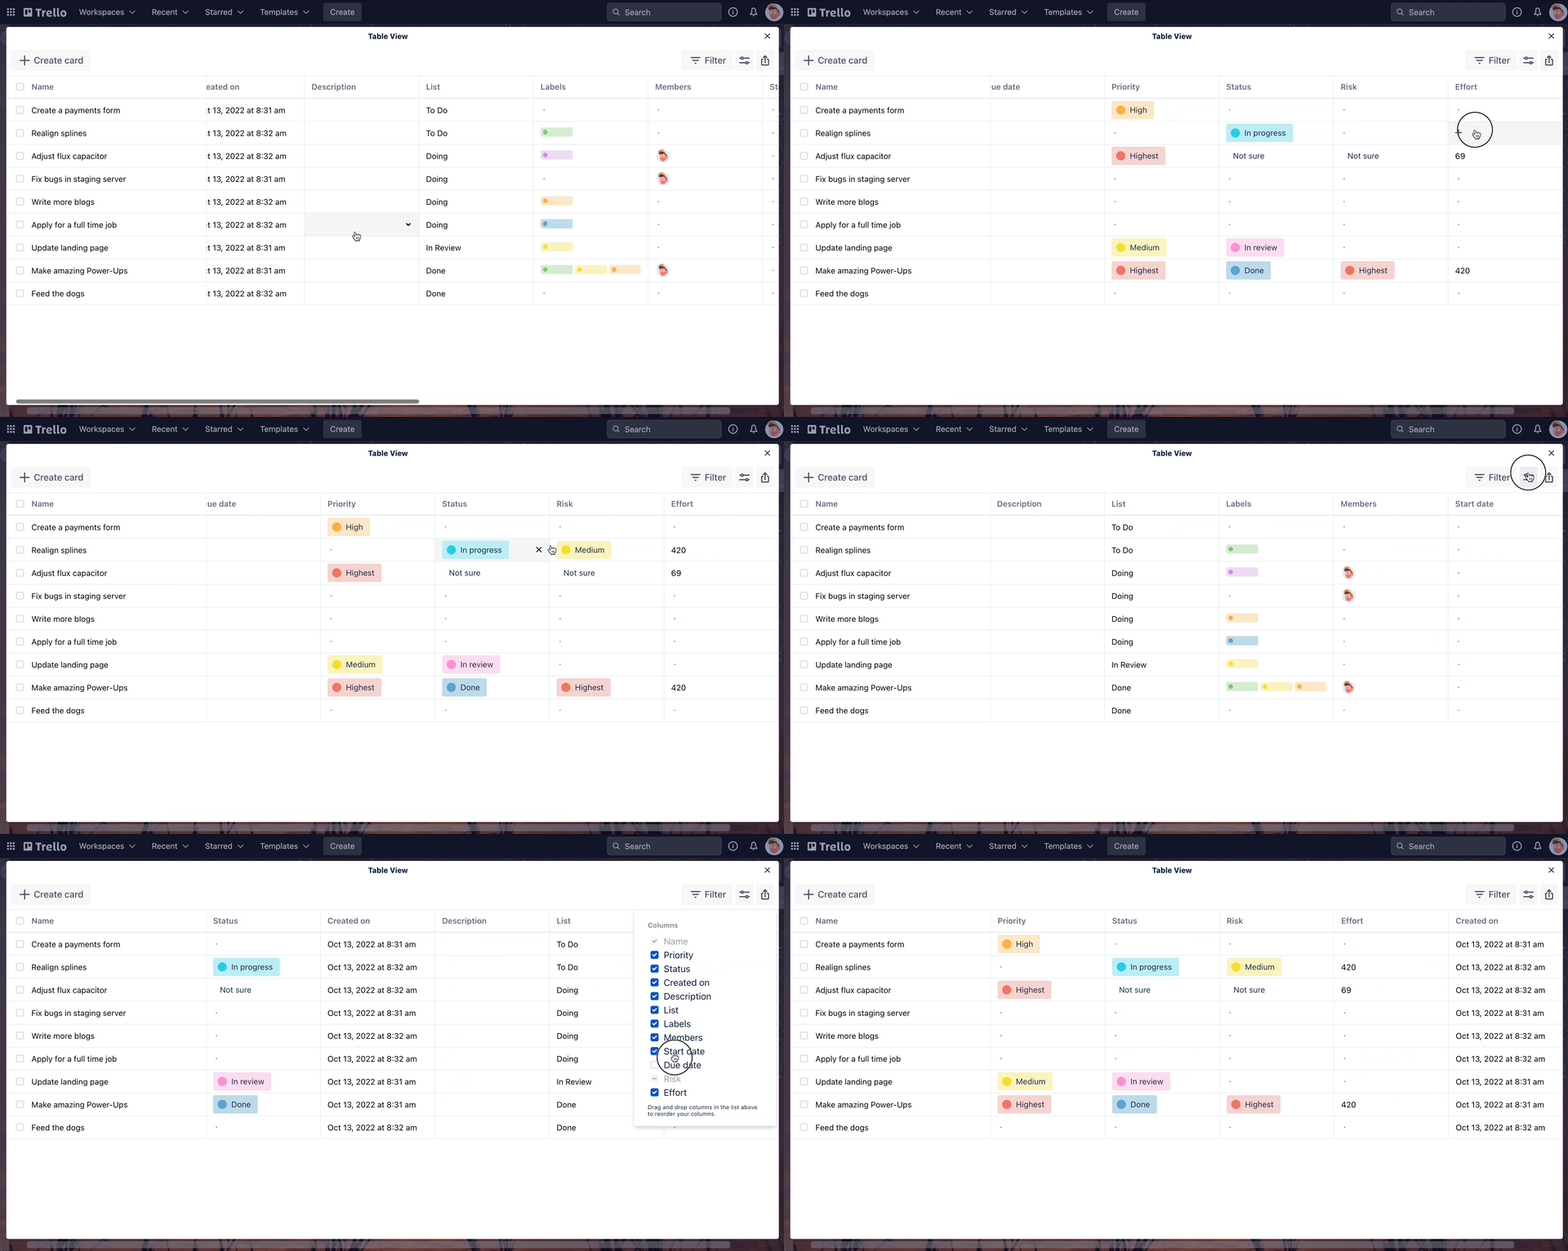
The classic Table View Power-Up has a bunch of features that the native Table view does not support such as bulk actions, exporting to CSV, and resizing the columns.
The Table View Power-Up is free to use for 7 days and then it'll require a Tiny Power-Ups Club membership which only costs $5 per month. This membership also includes unlimited access to all of our other Power-Ups such as External Share, Card Approvals, File Manager, and more!